
A precise spectrophotometer ensures accurate color reproduction in production. Spectrophotometer measurements are not static; proper calibration enhances the repeatability of results and reduces costly measurement errors. This article explains how to perform the necessary calibrations—a common part of daily maintenance—as well as troubleshooting tips and best practices for validation.
Why Is Spectrophotometer Calibration Important?
Regular calibration and validation of spectrophotometers are essential for obtaining reliable and accurate experimental results. In addition to enhancing the accuracy of results, regular calibration also reduces errors. Achieve traceability using NIST-traceable standards. ISO standards and many quality management systems require documented calibration and periodic validation to meet regulatory requirements. Regular spectrophotometer calibration also prevents product rework, errors, and audit failures caused by measurement deviations, thereby maximizing the reliability of measurement results.
How to Calibrate a Spectrophotometer?
Although spectrophotometers of different brands and models vary in structure, software interface, and operating procedures, instrument performance verification typically includes items such as warm-up, baseline correction, wavelength accuracy, photometric accuracy, and stray light. Specific calibration requirements and acceptance criteria should be based on the instrument manufacturer’s manual and relevant standards.
The following is a common procedure for spectrophotometer calibration and performance verification:
1. Instrument Inspection and Warm-up
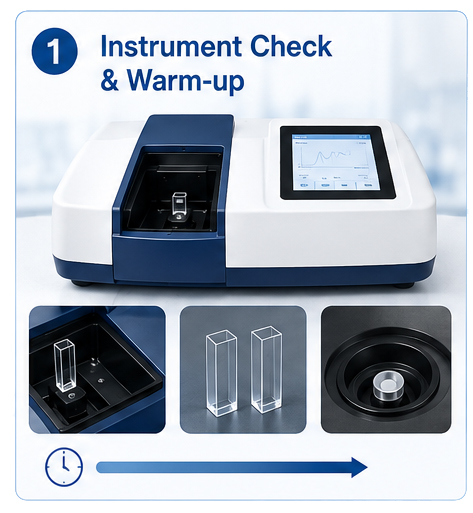
Before calibration, first inspect the instrument’s exterior, sample chamber, and optical components to ensure they are clean and free of dust, stains, or other contaminants that may affect measurements.
Check that cuvettes, filters, and other reference standards are clean and intact. When cleaning cuvettes, use a spectroscopic-grade solvent suitable for their material and wipe them with a lint-free soft cloth. Check for scratches, chips, or residues, as these defects may cause light scattering and affect measurement results.
Next, turn on the instrument and allow it to warm up according to the manufacturer’s instructions so that the light source, detector, and electronic systems reach a stable operating state. Warm-up times vary by model but typically range from 15 to 60 minutes.
2. Baseline and Blank Calibration
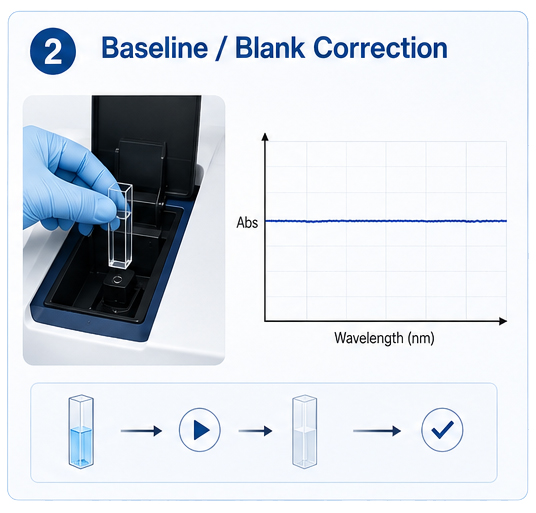
Prepare an appropriate blank solution according to the test method. For example, if the sample is prepared with deionized water, the same deionized water should be used as the blank. Fill a clean cuvette with an appropriate amount of blank solution, ensuring that the liquid level covers the area through which the light beam passes. Place the cuvette correctly in the sample chamber and keep the optical window aligned with the light path.
Select the instrument’s Baseline, Blank, Auto Zero, or equivalent function to perform baseline or blank correction according to the test mode. For spectral scanning, set an appropriate wavelength range based on the instrument and test method, and confirm that the corrected baseline is stable, with no significant abnormal drift or peak shapes.
Note: Baseline/blank correction is a measurement preparation step and does not constitute a comprehensive performance calibration of the instrument.
3. Wavelength Accuracy Verification
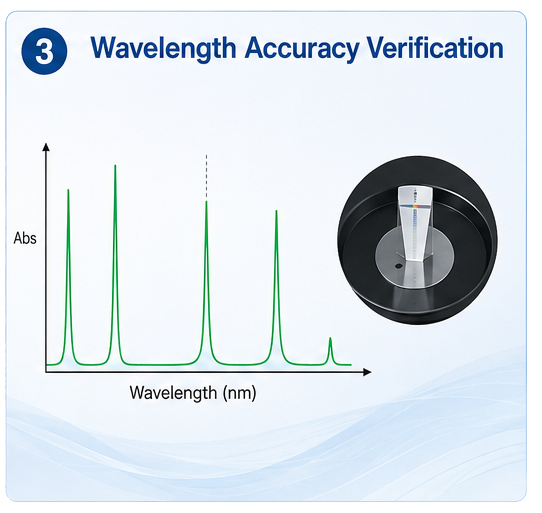
Wavelength accuracy is used to confirm whether the wavelength displayed or measured by the instrument matches the true wavelength.
Use certified wavelength standards, such as holmium oxide filters, mercury lamps, or neon lamps, which have well-defined characteristic spectral lines.
Perform a scan according to the specified method for the standard, record the characteristic peak wavelengths measured by the instrument, and compare them with the certified standard values.
4. Verification of Photometric Accuracy
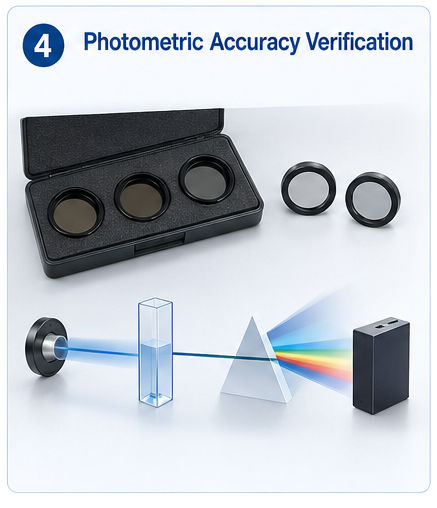
Photometric accuracy is used to verify the accuracy of an instrument’s measurements of absorbance or transmittance.
Depending on the type of spectrophotometer and applicable standards, tests may be conducted using certified neutral density filters, photometric standard filters, or standard solutions. Measure the standards at the specified wavelength and compare the absorbance or transmittance values measured by the instrument with the certified standard values.
5. Stray Light Verification
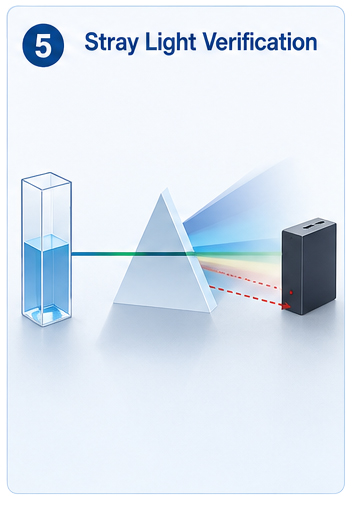
Stray light refers to light at non-target wavelengths that reaches the detector and can cause significant errors in high-absorbance measurements. Perform the test using a stray light standard filter or standard solution suitable for the instrument’s wavelength range, and measure the instrument’s response at the specified wavelength.
6. Baseline Flatness and Resolution Check
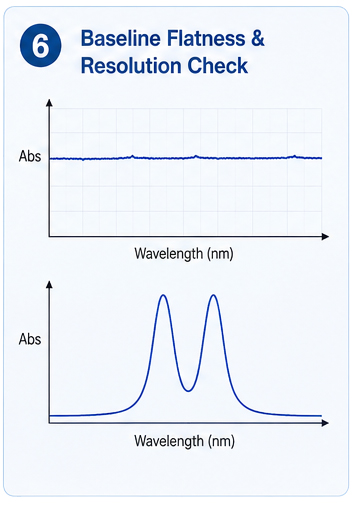
For instruments requiring high-precision spectral analysis, it is also necessary to check baseline flatness, noise, drift, and spectral resolution. Perform a baseline scan to observe whether the baseline remains stable across the entire test range, and check for any abnormal peaks, significant drift, or excessive noise.
For UV-Vis spectrophotometers with specific resolution requirements, appropriate reference materials can be used to verify spectral resolution capability.
7. Recording Calibration Results and Maintenance
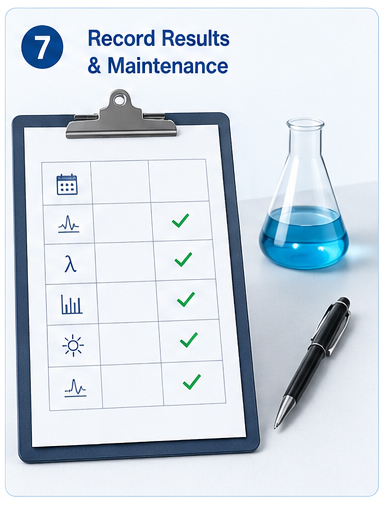
After completing all verification steps, record the test date, instrument model, reference material information, test conditions, measurement results, and evaluation findings. If all items fall within the specified tolerance ranges, the instrument’s performance may be deemed to meet operational requirements.
Troubleshooting Common Issues
| Issue | Possible Causes | Recommended Solutions |
| Large Wavelength Error | Aging light source, grating misalignment, slit failure | Replace deuterium/tungsten lamp → Recalibrate wavelength |
| Low Absorbance | Contaminated optical path, scratched cuvette, moldy filter | Clean optical components → Replace consumables |
| High Baseline Noise (UV Range) | Deuterium lamp nearing end of life, contaminated mirror | Check lamp energy → Replace if below 50% of the initial value |
| High Baseline Noise (Visible Range) | Aging tungsten lamp, optical path misalignment | Replace light source → Realign optical path |
| Excessive Stray Light | Poor monochromator sealing, moisture-damaged grating | Dry the instrument → Clean the monochromator → Replace components if necessary |
| Poor Reproducibility | Insufficient warm-up, unstable power supply, loose sample holder | Extend warm-up time → Use a stable power supply → Check and secure the sample holder |
Conclusion
Spectrophotometers are essential quantitative tools in the fields of chemical analysis, biological testing, pharmaceutical research and development, environmental monitoring, and materials characterization. A spectrophotometer in good working condition can maintain wavelength accuracy within ±0.3 nm and achieve absorbance repeatability of ≤0.001 Abs. However, due to light source aging, contamination of optical components, wear on mechanical drive systems, and fluctuations in ambient temperature and humidity, the instrument’s performance will undergo irreversible drift over time. Regular, standardized, and traceable calibration is essential for ensuring precise measurements.


Get Social